Creating a Safety Data Sheet (SDS) is essential for communicating the hazards and safe handling practices of chemical substances. An effective SDS helps ensure the safety of workers and consumers who handle or use hazardous materials.
In this guide, we’ll walk you through the process of SDS authoring or creation using dedicated SDS software, making the task more efficient and professional.
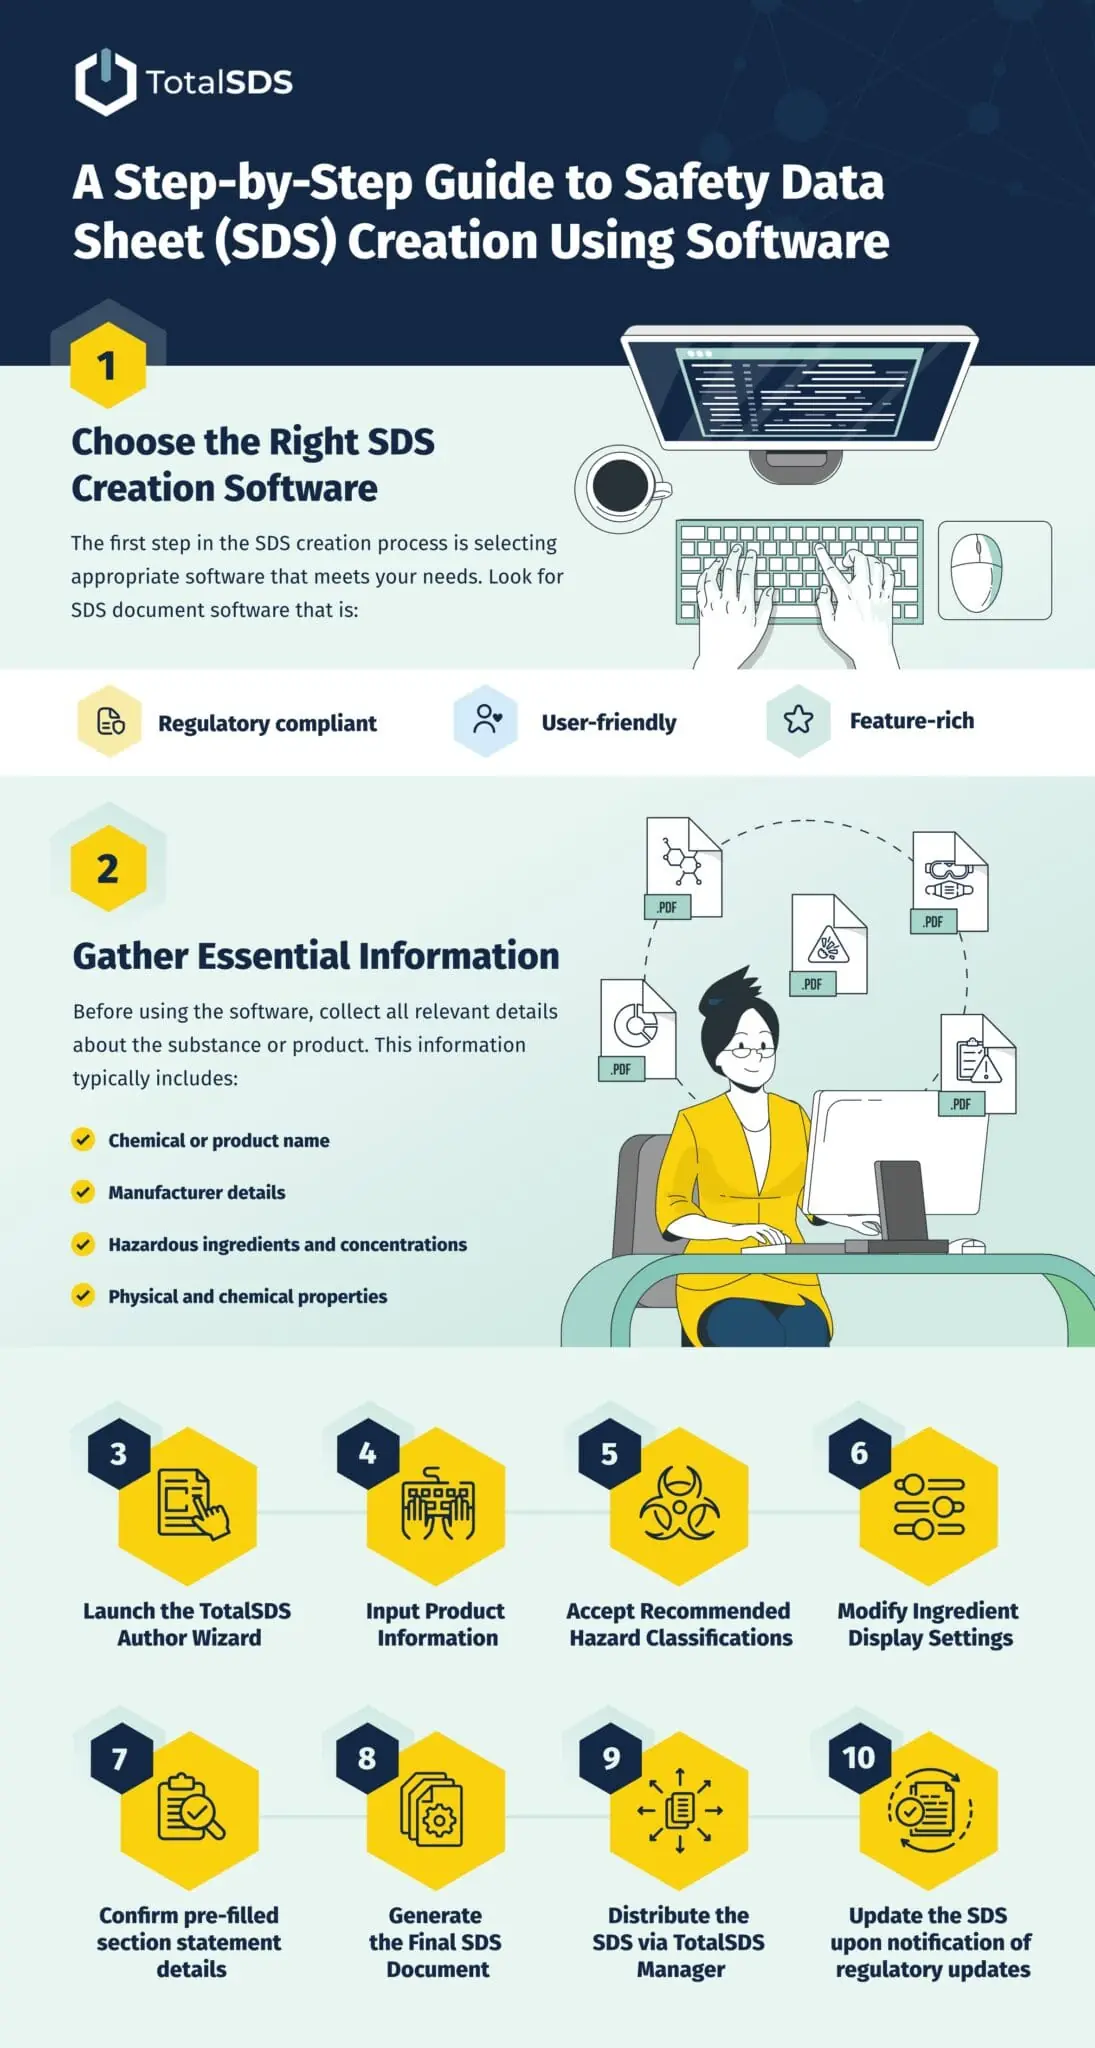
Step 1: Choose the Right SDS Creation Software
The first step in the SDS creation process is selecting appropriate software that meets your needs. Look for SDS document software that is:
- Regulatory compliant: Ensure it adheres to the latest safety regulations.
- User-friendly: Choose a platform that is easy to navigate.
- Feature-rich: Opt for software that offers templates and tools necessary for comprehensive SDS development.
Step 2: Gather Essential Information
Before using the software, collect all relevant details about the substance or product. This information typically includes:
- Chemical or product name
- Manufacturer details
- Hazardous ingredients and concentrations
- Physical and chemical properties
- Handling and storage requirements
- First-aid measures
- Fire-fighting measures
- Accidental release measures
- Exposure controls and personal protection
Step 3: Start Your SDS Document
Open your SDS software and begin a new SDS document. Depending on the program, you may find various templates suited for different types of substances. Select the appropriate template for your product to ensure compliance with relevant guidelines.
Step 4: Input Product Information
Enter the collected data into the SDS software. Accuracy is paramount—errors can lead to potential hazards. Provide clear, concise descriptions of the dangers associated with the substance and outline necessary precautions.
Step 5: Add Hazard Classifications and Symbols
Your SDS creation software should allow you to input hazard classifications and symbols according to regulatory standards like the Globally Harmonized System (GHS). These classifications effectively communicate the hazards of the product to users.
Step 6: Include Safety Precautions and First-Aid Measures
Ensure your SDS details appropriate safety precautions and first-aid measures for potential exposure or accidents. This information is crucial for protecting workers and emergency responders.
Step 7: Review and Validate Your SDS Document
Thoroughly review the SDS for accuracy and completeness. It’s advisable to have a subject matter expert validate the document to ensure it meets all regulatory requirements and is free of errors.
Step 8: Generate the Final SDS Document
Once you’re satisfied with the content, generate the final SDS document using the software. Save it in a secure location for easy access and distribution.
Step 9: Distribute the SDS
Distribute the SDS to all relevant parties, including employees, customers, and suppliers, as required by regulations. Consider providing both digital and printed versions to ensure accessibility.
Step 10: Regularly Update the SDS
As safety data and regulations evolve, regularly review and update your SDS. Use the same software for revisions to keep your SDS compliant and up-to-date.
Why Using SDS Software is Superior to Manual Creation
Creating Safety Data Sheets (SDS) manually can be a daunting task fraught with challenges. While it’s possible to compile an SDS by hand, using dedicated SDS software offers numerous advantages that streamline the process and enhance accuracy. Here are some key reasons why software is the better choice:
1. Regulatory Compliance
SDS software is designed to keep up with the latest regulatory standards, ensuring that your documents meet compliance requirements automatically. Manually creating an SDS may lead to oversights or outdated information, potentially putting your business at risk of penalties.
2. Efficiency and Time Savings
Using SDS software significantly reduces the time required to create and update safety data sheets. With templates and built-in guidance, you can quickly input information without having to start from scratch. This efficiency allows you to focus on other critical aspects of your business.
3. Error Reduction
Manual data entry is prone to human error, which can lead to inaccurate information on safety data sheets. SDS software helps minimize these risks by providing structured formats and validation checks, ensuring that all necessary information is correctly captured and presented.
4. Centralized Management
SDS software allows for centralized storage and management of all your safety data sheets. This makes it easier to access, update, and distribute documents as needed. In contrast, manual systems can lead to confusion, with different versions of documents scattered across various locations.
5. Automated Updates
With the ever-changing landscape of safety regulations, it’s crucial to keep your SDS current. SDS software often includes features that alert you to regulatory updates, allowing you to revise your documents automatically to maintain compliance.
6. User-Friendly Features
Many SDS creation software options come equipped with user-friendly features, such as drag-and-drop functionalities and easy navigation, making the process straightforward even for those without technical expertise. This can significantly lower the learning curve compared to manual methods.
How TotalSDS Can Assist with SDS Creation and Management
TotalSDS specializes in SDS creation and management, offering a comprehensive software solution that simplifies the entire process. Here’s how we can help:
- Intuitive Interface: Our user-friendly platform allows you to create and manage SDS documents with ease, minimizing the time and effort required.
- Regulatory Compliance: TotalSDS keeps your documents in line with the latest regulations, ensuring that you remain compliant and reducing the risk of legal issues.
- Customizable Templates: Choose from a range of customizable templates tailored to different types of substances, ensuring your SDS meets industry standards.
- Automated Updates: Our software provides automated alerts for regulatory changes, allowing you to update your SDS swiftly and maintain compliance.
- Centralized Storage: Easily manage all your safety data sheets in one secure location, making access and distribution simple and efficient.
- Expert Support: Our team is available to provide guidance and support throughout the SDS creation and management process, ensuring you have the resources you need to succeed.
By choosing TotalSDS, you gain access to powerful tools that enhance the accuracy, efficiency, and compliance of your Safety Data Sheet creation process. Say goodbye to the challenges of manual SDS development and embrace a streamlined, professional approach with TotalSDS!
SDS Guidance: Using Trust Safety Data Sheet Creation Software
Creating an SDS using specialized software can streamline the process, ensuring accurate and consistent documentation. By following this step-by-step guide, you can effectively create an SDS that enhances safety and promotes compliance within your organization.
For more information on how our SDS guidance and safety data sheet creation software can simplify your SDS document management, schedule a demo with TotalSDS today! We’re here to help make your SDS creation process easier and more efficient.


